Welcome! This manual assists new Nikon D70S owners‚ offering a comprehensive guide to unlock the camera’s potential and enhance photographic skills.
Beginner-friendly‚ it details setup‚ operation‚ and features‚ ensuring a smooth transition into the world of digital SLR photography.
Explore the D70S’s capabilities‚ from basic settings to advanced techniques‚ and capture stunning images with confidence and creativity.
What’s in the Box
Upon unboxing your Nikon D70S‚ carefully verify the contents against the included list to ensure everything is present. You should find the D70S camera body itself‚ a comprehensive owner’s manual providing detailed instructions and troubleshooting tips.
Additionally‚ the box contains a battery and battery charger‚ essential for powering your camera and keeping you shooting. A strap is included for comfortable carrying‚ and a USB cable facilitates image transfer to your computer.
Software CDs are also provided‚ containing Nikon Capture NX and other useful software for image editing and organization. Finally‚ you’ll find body cap‚ hot-shoe cover‚ and various documentation like warranty information. Retain all packaging and materials for potential warranty claims or future reference.
D70S Key Features
The Nikon D70S boasts a 6.3-megapixel CCD image sensor‚ delivering detailed and vibrant photographs. Its continuous shooting capability reaches up to 5 frames per second‚ ideal for capturing action sequences. A 9-point autofocus system ensures sharp focus across a wide area of the frame.
The camera features a large 2.0-inch LCD screen for easy image review and menu navigation. It offers a wide ISO range (200-1600) for shooting in various lighting conditions. Multiple exposure modes‚ including Auto‚ Program‚ Aperture-Priority‚ Shutter-Priority‚ and Manual‚ provide creative control.
Built-in flash with various modes enhances low-light photography. The D70S is compatible with a wide range of Nikon lenses and accessories‚ expanding its versatility.
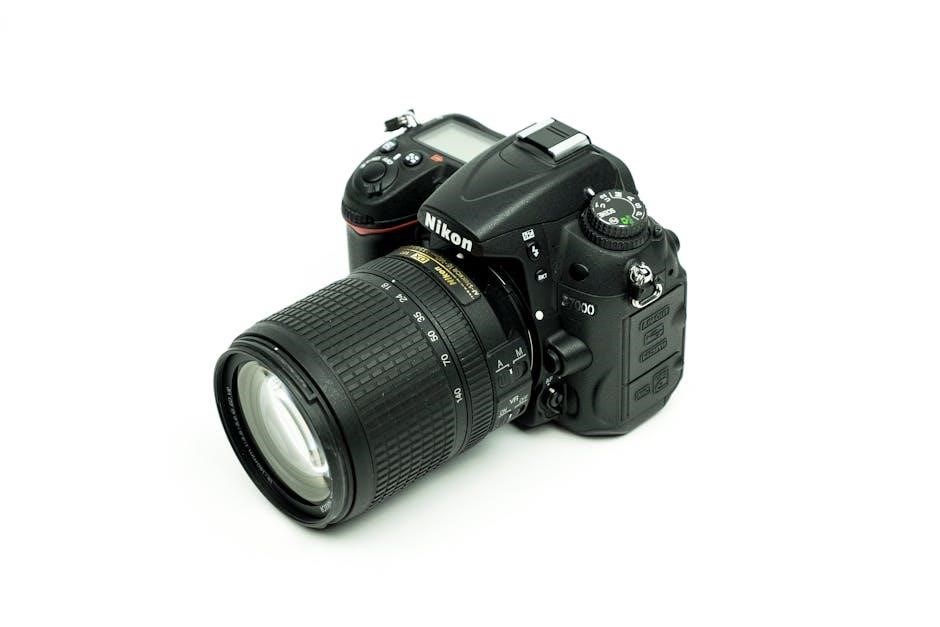
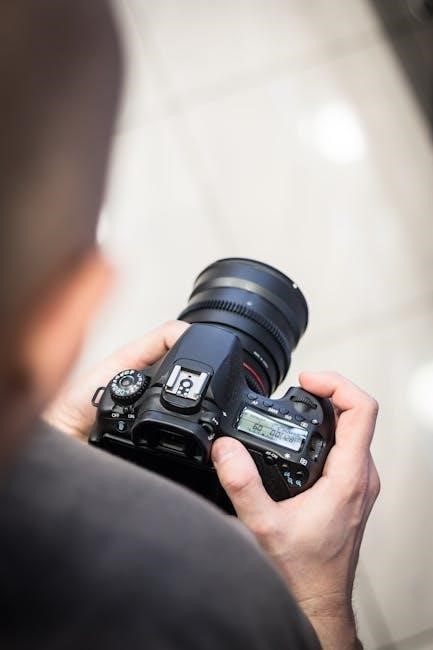
Understanding the Camera Body
Familiarize yourself with the D70S’s layout! This section details the location and function of all buttons‚ dials‚ and ports for optimal control.
Front Panel Overview
The Nikon D70S front panel houses several key components essential for operation. Prominently featured is the lens mount‚ accepting Nikon F-mount lenses‚ enabling a wide range of photographic possibilities. Adjacent to the lens mount‚ you’ll find the autofocus-assist illuminator‚ aiding low-light focusing.
Below the lens mount resides the depth-of-field preview button‚ allowing visualization of the image’s sharpness at the selected aperture. Further down‚ the sub-command dial facilitates adjustments to settings like aperture or shutter speed‚ depending on the shooting mode. Finally‚ the microphone is positioned for audio recording during video capture. Understanding these elements is crucial for efficient camera handling and achieving desired photographic results.
Rear Panel Overview
The Nikon D70S rear panel is dominated by the large‚ bright 2.0-inch LCD screen‚ used for composing shots‚ reviewing images‚ and navigating menus. To the right of the LCD‚ a cluster of buttons provides access to essential functions like image playback‚ menu navigation‚ and white balance adjustments.
Below the LCD‚ the multi-selector enables precise menu navigation and focus point selection. Alongside‚ dedicated buttons control image quality‚ ISO sensitivity‚ and autofocus mode. The diopter adjustment dial corrects the viewfinder focus for individual eyesight. Finally‚ the speaker grille delivers audio feedback. Familiarizing yourself with this layout streamlines operation and enhances your shooting experience.
Top Panel Overview
The Nikon D70S top panel houses critical controls for immediate access during shooting. Dominating the center is the mode dial‚ allowing quick selection of Auto‚ Program‚ Aperture-Priority‚ Shutter-Priority‚ and Manual modes. To the right‚ the main command dial adjusts settings like aperture‚ shutter speed‚ and exposure compensation.
The shutter release button‚ paired with the on/off switch‚ initiates both shooting and metering. Nearby‚ the metering mode button selects the desired metering method. The flash control button manages built-in flash settings. Finally‚ the depth-of-field preview button simulates the image’s depth of field. Understanding this layout ensures efficient control and a responsive shooting workflow.
Bottom Panel Overview
The Nikon D70S bottom panel primarily focuses on battery and storage access. A secure compartment houses the EN-EL3a/EN-EL3e rechargeable lithium-ion battery‚ ensuring reliable power for extended shooting sessions. Adjacent to the battery‚ you’ll find the CF card slot‚ accommodating CompactFlash memory cards for image storage.
A tripod socket is centrally located‚ enabling stable camera mounting for sharp images‚ especially in low-light conditions. Additionally‚ a connector cover protects the camera’s remote release terminal. Carefully managing battery life and CF card capacity is crucial for uninterrupted shooting. Familiarizing yourself with this panel ensures smooth operation and prevents unexpected interruptions during your photographic endeavors.
Basic Camera Settings
Essential settings include date/time‚ image quality (RAW‚ JPEG)‚ and ISO sensitivity. Proper configuration ensures accurate image metadata and optimal picture quality for various conditions.
Setting the Date and Time
Accurate date and time settings are crucial for proper image organization and metadata tagging. To set the date and time on your Nikon D70S‚ navigate to the Setup Menu using the multi-selector and press the OK button.
Within the Setup Menu‚ locate the “Date/Time” option and select it. You’ll then be presented with options to adjust the year‚ month‚ day‚ hour‚ and minute. Use the multi-selector to highlight the desired field and the main command dial to change the value.
Ensure you select the correct date and time format (MM/DD/YYYY or DD/MM/YYYY) based on your preference. After setting all the parameters‚ press the OK button to save the changes. The camera will now accurately record the date and time with each captured image‚ aiding in efficient photo management and archiving.
Choosing the Image Quality and Size
Selecting the appropriate image quality and size directly impacts file size‚ detail‚ and storage capacity. Access the Shooting Menu via the camera’s multi-selector and OK button. Locate the “Image Quality” setting.
You’ll find options like RAW + JPEG‚ JPEG Fine‚ JPEG Normal‚ and JPEG Basic. RAW offers maximum editing flexibility but creates larger files. JPEG Fine provides a good balance between quality and file size‚ while Normal and Basic offer smaller files with reduced detail.
Next‚ choose the “Image Size.” Options include Large‚ Medium‚ and Small‚ determining the pixel dimensions of your images. Larger sizes are ideal for printing‚ while smaller sizes are suitable for web use. Consider your intended use when making these selections.
Selecting the ISO Sensitivity
ISO sensitivity controls your camera’s sensitivity to light. Lower ISO settings (e.g.‚ 100‚ 200) are best for bright conditions‚ producing cleaner images with less noise. Higher ISO settings (e.g.‚ 400‚ 800‚ 1600‚ 3200) are useful in low light‚ but introduce more noise or grain.
Access the ISO setting through the camera’s menu system. The Nikon D70S offers Auto ISO‚ allowing the camera to choose the optimal setting. However‚ manual control provides greater creative control.
Experiment with different ISO values to understand their impact on image quality. Remember that increasing ISO allows for faster shutter speeds‚ reducing motion blur‚ but at the cost of increased noise. Balance sensitivity with image quality based on your shooting environment.

Shooting Modes Explained
Explore diverse shooting modes on your Nikon D70S‚ ranging from fully automatic simplicity to complete manual control‚ tailoring settings to your vision.
Master each mode to confidently capture stunning photos in any situation‚ unlocking the camera’s full creative potential.
Auto Mode
Auto Mode on the Nikon D70S is the simplest way to begin capturing images immediately. The camera automatically selects all settings – aperture‚ shutter speed‚ ISO‚ and white balance – based on the scene it detects. This makes it ideal for beginners or situations where quick‚ effortless shooting is required.
To engage Auto Mode‚ simply set the mode dial on top of the camera to the green “Auto” setting. The camera will then analyze the scene and optimize settings for what it perceives as the best possible exposure. While convenient‚ Auto Mode offers limited creative control.
However‚ it’s a fantastic starting point for learning and understanding how the camera responds to different lighting conditions. Remember that the camera’s interpretation of the scene might not always align with your artistic intent‚ so exploring other modes is encouraged as your skills develop.
Program Mode (P)
Program Mode (P) on the Nikon D70S offers a balance between automatic operation and creative control. The camera automatically sets both the aperture and shutter speed‚ but allows the photographer to adjust other settings like ISO‚ white balance‚ and exposure compensation. This provides more flexibility than full Auto Mode.
In Program Mode‚ you can influence the camera’s choices using exposure compensation. This allows you to brighten or darken the image without directly controlling aperture or shutter speed. It’s a useful tool for fine-tuning exposure in challenging lighting situations.
Program Mode is excellent for general photography where you want the camera to handle the technical aspects while you focus on composition and subject matter. It’s a stepping stone towards more manual control.
Aperture-Priority Mode (A)
Aperture-Priority Mode (A) on the Nikon D70S empowers you to control the depth of field‚ while the camera automatically selects the appropriate shutter speed for correct exposure. This mode is ideal for situations where controlling background blur is crucial‚ such as portrait photography.
Selecting a wider aperture (lower f-number like f/2.8) creates a shallow depth of field‚ blurring the background and isolating your subject. Conversely‚ a narrower aperture (higher f-number like f/16) increases the depth of field‚ keeping more of the scene in focus.
Remember to monitor the shutter speed displayed by the camera to ensure it’s fast enough to prevent motion blur‚ especially when shooting handheld. Exposure compensation can further refine the image brightness.
Shutter-Priority Mode (S)
Shutter-Priority Mode (S) on your Nikon D70S allows you to dictate the shutter speed‚ while the camera automatically adjusts the aperture to achieve proper exposure. This mode excels in capturing motion‚ either freezing it or intentionally blurring it for creative effect.
Fast shutter speeds (e.g.‚ 1/500s or faster) are perfect for freezing fast-moving subjects like sports or wildlife. Slower shutter speeds (e.g.‚ 1/30s or slower) create motion blur‚ ideal for conveying a sense of movement or capturing light trails;
Pay attention to the aperture value selected by the camera; ensure it provides sufficient depth of field for your scene. Utilize exposure compensation if needed to fine-tune the overall brightness.
Manual Mode (M)
Manual Mode (M) grants you complete creative control over both shutter speed and aperture on your Nikon D70S. This mode requires a solid understanding of the exposure triangle – the relationship between aperture‚ shutter speed‚ and ISO – to achieve desired results.
Use the camera’s light meter as a guide‚ adjusting settings until the indicator reaches the center (0). Experiment with different combinations to explore depth of field and motion blur. Manual mode is invaluable for challenging lighting situations where automatic modes struggle.
Remember to regularly check your histogram to ensure proper exposure and avoid clipping highlights or shadows. Practice makes perfect – embrace the learning curve!

Focusing and Metering
Achieve sharp images by mastering autofocus modes and selecting appropriate focus points. Understand metering modes to ensure accurate exposure in diverse lighting conditions.
Autofocus Modes
The Nikon D70S offers several autofocus (AF) modes to suit various shooting scenarios. Single Servo AF (AF-S) is ideal for stationary subjects‚ locking focus when the shutter button is half-pressed. This mode is perfect for portraits or landscapes where the subject isn’t moving.
Continuous Servo AF (AF-C)‚ conversely‚ tracks moving subjects‚ continuously adjusting focus as they change position. This is essential for action photography‚ like sports or wildlife. Automatic Servo AF (AF-A) allows the camera to automatically switch between AF-S and AF-C‚ attempting to determine the best mode based on the subject’s movement.
Manual Focus (MF) provides complete control‚ allowing precise focusing using the focusing ring on the lens. Remember to select the appropriate AF mode in the camera’s menu to optimize performance for your specific shooting needs.
Focus Points Selection
The Nikon D70S utilizes a 5-point autofocus system‚ offering flexibility in selecting where the camera focuses. You can choose to use all five focus points automatically‚ allowing the camera to determine the best point for focus. Alternatively‚ you can manually select a single focus point for greater precision.
Dynamic-area AF allows you to select a focus point‚ and the camera will then prioritize that point but also consider surrounding points if the subject moves slightly. Manual focus point selection is achieved through the camera’s menu or using the directional buttons on the rear panel.
Understanding focus point behavior is crucial for sharp images. Experiment with different settings to find what works best for your subject and shooting style.
Metering Modes
The Nikon D70S offers three primary metering modes to assess exposure: Matrix‚ Center-weighted‚ and Spot. Matrix metering evaluates the entire scene‚ ideal for general photography. It’s a balanced approach‚ suitable for most situations. Center-weighted metering prioritizes the center of the frame‚ useful when your subject is centrally located and you want to ensure proper exposure there;
Spot metering measures light from a very small area‚ allowing precise exposure control for challenging lighting conditions. This is particularly helpful when photographing subjects against bright or dark backgrounds.
Selecting the appropriate metering mode significantly impacts image exposure. Experiment to understand how each mode affects your photos in different scenarios.
Using the Built-in Flash
The D70S’s built-in flash provides supplemental light for various shooting scenarios. Explore flash modes‚ compensation‚ and red-eye reduction for optimal results.
Flash Modes
The Nikon D70S offers several flash modes to suit diverse photographic situations. Auto mode lets the camera automatically determine if flash is needed‚ ideal for general shooting. Auto with Red-Eye Reduction employs a pre-flash to minimize red-eye effects in portraits.
Fill-Flash mode forces the flash to fire‚ adding light even in bright conditions – useful for balancing exposure or filling shadows. Slow Sync combines a slower shutter speed with the flash‚ capturing ambient light and motion blur while illuminating the subject. This is excellent for low-light scenes.
Rear-Curtain Sync fires the flash at the end of the exposure‚ creating unique trailing effects with moving subjects; Finally‚ Flash Off disables the built-in flash‚ allowing you to rely solely on ambient light or an external flash unit. Understanding these modes empowers you to control lighting creatively.
Flash Compensation
Flash compensation on the Nikon D70S allows you to fine-tune the flash output‚ overriding the camera’s automatic exposure settings. This is crucial when the automatic flash exposure isn’t quite right‚ resulting in images that are too bright or too dark. The D70S offers compensation adjustment in increments of 0.5 EV (Exposure Value)‚ ranging from -3 EV to +3 EV.
Positive values (+EV) increase flash power‚ brightening the image‚ while negative values (-EV) reduce flash power‚ darkening it. Use this feature to balance the flash with the ambient light‚ preventing harsh shadows or blown-out highlights. Experimenting with flash compensation is key to achieving well-exposed and natural-looking flash photographs.
Remember to reset the compensation to 0 EV when not actively adjusting flash output to ensure accurate automatic exposures in subsequent shots.
Red-Eye Reduction
Red-eye occurs when the camera flash reflects off the retina of a subject’s eyes‚ creating a red appearance in the photograph. The Nikon D70S offers several red-eye reduction features to minimize this effect. The camera incorporates a pre-flash sequence‚ emitting a series of rapid flashes before the main flash fires. This causes the subject’s pupils to constrict‚ reducing the amount of light reflected back into the camera.
You can select from different red-eye reduction modes within the flash settings menu. Options include auto‚ where the camera determines if pre-flashes are needed‚ and manual activation. Positioning the flash slightly above the lens can also help reduce red-eye.
Despite these features‚ red-eye isn’t always completely avoidable‚ especially in low-light conditions. Post-processing software can also be used to correct red-eye in images.

Navigating the Menu System
The D70S menu is logically organized into Setup‚ Custom Settings‚ and Shooting menus‚ allowing photographers to personalize camera functions efficiently.
Access is via the ‘Menu’ button‚ utilizing the directional pad for navigation and the ‘OK’ button for selection.
Explore each menu to tailor settings to your shooting style and unlock the camera’s full potential.
Setup Menu Options
The Setup menu on the Nikon D70S provides essential camera configuration options. Display settings allow customization of the LCD screen’s brightness‚ color‚ and information display‚ including viewfinder settings. Button customization lets you assign specific functions to camera buttons for quicker access.
Language selection enables you to choose your preferred language for the menu interface. Date/Time settings are crucial for accurate image timestamps. File Naming options control how your images are named for easy organization. Sensor Cleaning initiates the sensor cleaning process to remove dust particles.
Video Settings‚ though limited on the D70S‚ allow basic video adjustments. Format Memory Card prepares a memory card for use. General Settings include options like USB communication and auto-off timers. Finally‚ Factory Reset restores the camera to its original default settings.
Custom Settings Menu
The Custom Settings menu on the Nikon D70S offers extensive personalization options for experienced photographers. Autofocus settings allow fine-tuning of AF-C tracking sensitivity and AF-S focus priority. Metering/Exposure settings control how the camera measures light and sets exposure‚ including options for highlight-weighted metering.
AE Lock settings determine how Auto Exposure Lock behaves. Image Quality settings allow customization of JPEG compression and RAW file settings. Display settings further refine the LCD and viewfinder information. Audio settings control beep sounds for focus and other functions.
Button/Dial operations enable remapping of camera controls. Shooting/Display settings adjust shooting intervals and image review times. Movie settings (limited on this model) offer basic video adjustments. These settings allow tailoring the D70S to individual shooting styles.
Shooting Menu Options
The Shooting Menu on the Nikon D70S provides direct access to core photographic settings. Image Quality lets you select JPEG size/compression or RAW formats. ISO Sensitivity controls the camera’s sensitivity to light‚ impacting image noise. White Balance adjusts color temperature for accurate rendering. Picture Control offers creative presets like Vivid or Monochrome.
Active D-Lighting optimizes dynamic range in high-contrast scenes. Flash Control manages built-in flash settings. Focus Mode selects autofocus behavior (Auto‚ Single‚ Continuous). Exposure Delay Mode minimizes camera shake. Auto ISO automatically adjusts ISO for proper exposure.
Metering Mode determines how the camera measures light. These options allow photographers to quickly adjust key settings for various shooting conditions and creative effects.
Troubleshooting Common Issues
Encountering problems? This section addresses frequent D70S issues like flash failures‚ error messages‚ and image quality concerns‚ offering practical solutions.
Resolve common hiccups quickly‚ ensuring uninterrupted shooting and maximizing your camera’s performance for consistently excellent results.
Don’t worry‚ many issues have simple fixes‚ allowing you to return to capturing memorable moments with your Nikon D70S.
Flash Not Firing
A non-firing flash can stem from several causes. First‚ verify the flash mode is not set to ‘Off’ or ‘Slow Sync’. Ensure sufficient battery power in both the camera and any external flash unit attached. Check the camera’s menu settings; a flash prohibition might be active.
Confirm proper lens compatibility‚ as some older lenses may not communicate flash readiness effectively. If using an external flash‚ ensure it’s securely mounted and the contacts are clean. Test with a different lens to isolate the issue.
Review the error messages displayed on the LCD screen‚ as they often pinpoint the problem. If the flash still fails‚ a reset to factory defaults might resolve software glitches. Finally‚ if the camera was gifted without documentation‚ professional servicing may be necessary.
Error Messages
Nikon D70S error messages indicate specific camera issues. “Err” often signals a mechanical problem‚ potentially with the shutter or mirror mechanism – immediate servicing is advised. “F**” suggests a problem with the flash unit or its communication with the camera; check battery and connections.
Battery-related errors (low battery symbol) require charging or replacement. Memory card errors (“Card full” or “Card error”) necessitate formatting or a different card. Lens communication issues may display an error; try reattaching the lens.
Consult the full error code list in the camera’s manual for detailed explanations and troubleshooting steps. Note the specific code and context when seeking assistance from Nikon support or a qualified repair technician.
Image Quality Problems
Poor image quality on your Nikon D70S can stem from several factors. Noise‚ particularly in low light‚ can be reduced by lowering the ISO setting. Blurry images often indicate incorrect focusing or a slow shutter speed; use a tripod for stability.
Incorrect white balance results in unnatural colors; experiment with presets or custom settings. Over or underexposed photos require adjusting aperture‚ shutter speed‚ or ISO. Check lens cleanliness – smudges significantly impact sharpness.
Ensure the correct image quality setting (RAW vs. JPEG) is selected in the menu. RAW offers greater editing flexibility. Finally‚ verify your memory card isn’t nearing capacity‚ as this can sometimes cause issues.